Monday, June 7, 2010

Spinach Pasta

MAKING FRESH PASTA WITH SPINACH (GREEN PASTA)


SPINACH  PASTA

Serves 4

Making pasta with spinach is much the same as basic pasta - you want to make sure that the spinach is as well drained, as dry as possible. Even so, you will probably have to add more flour to compensate for the additional moisture in the spinach.

1 1/2 cups of wheat flour
2 large eggs
1/2 of a 10-ounce package of frozen chopped spinach, or use equivalent of fresh spinach
a bit of olive oil or water if mixture is too dry or stiff
BY HAND:


Cook the spinach according to package directions, drain well, and cool. Squeeze as much water out of the spinach as you can, then squeeze again. Reserve liquid in the event that the dough is too dry. Chop the spinach finely. If you make a ball of the spinach at this point, it will be about the size of a large egg.

SPINACH

Put the flour on your working surface or in a large mixing bowl. Make a well in the center of the flour large enough to hold the eggs and the spinach. Add the eggs, then the spinach (in bits). With a fork, mix the egg and spinach mixture, then slowly gather the flour into the egg with a fork. If the pasta is too sticky to work with, add flour, one T at a time, but make sure that you are mixing well after each addition. If the pasta is too stiff or dry, you can add a T or water, reserved blanching water or olive oil.

TO FINISH

Knead the dough by hand for 8 to 10 minutes. Add additional flour as needed, 1 T at a time.

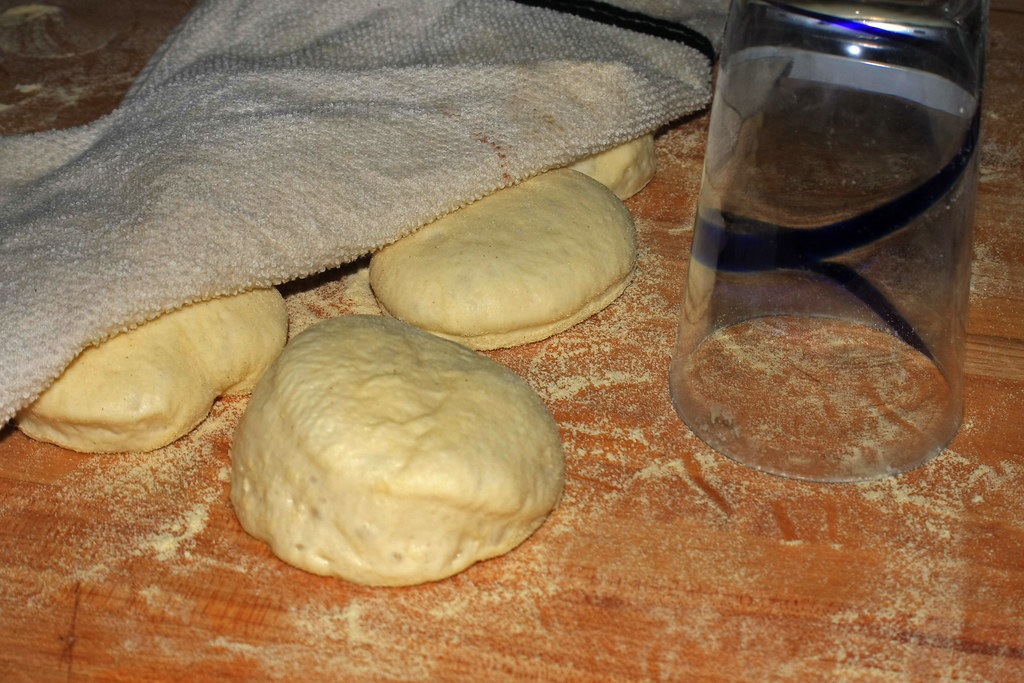
Roll out the pasta with a rolling pin in a round sheet as thin as you can, or divide it into balls about the size of a ping-pong ball and run it through decreasing settings on your pasta machine, folding it over to maintain the width, until you are at the next to last or last (thinnest) setting.

ROLLING

Let the sheets dry for about half an hour - it should be dry to the touch but still flexible. If it sticks to your pasta machine, it is not dry enough.

DRYING

Cut to desired width. You really need three hands for this - one to hold the pasta sheet, one to feed the pasta into the machine, and one to turn the handle...

CUTTING

If a 'pass' doesn't work, re-form the pasta into a ball and roll it out in a sheet again.
Once you have cut your pasta, a bit of semolina helps to keep the pasta separated until you are ready to cook it. You can also store the pasta loosely packed in an open ziploc bag in the refrigerator for one or two days.


Next time I make this, I'll be sure to take my own pictures so I don't have to rely on someone else. My pasta didn't turn out quite so green.

ENJOY!

Sunday, February 28, 2010

French Bread

This is some seriously delicious French Bread that I found on Allrecipes.com


Ingredients:
1 1/4 cups water (70 to 80 degrees F)
2 teaspoons sugar
1 teaspoon salt
3 1/2 cups bread flour
1 1/2 teaspoons active dry yeast
1 tablespoon cornmeal

GLAZE:
1 egg
1 tablespoon water
2 teaspoons sesame seeds, toasted

Directions:
1. In bread machine pan, place the first five ingredients in the order suggested by the manufacturer. Select dough setting (check dough after 5 minutes of mixing; add 1 to 2 tablespoons of water or flour if needed).
2. When cycle is completed, turn dough onto a lightly floured surface. Divide in half. Roll each portion into a 10-in. x 8-in. rectangle. Roll up jelly-roll style, starting with a long side; pinch seams to seal.
3. Sprinkle a greased baking sheet with cornmeal; place loaves seam side down on prepared pan. Cover and let rise in a warm place until doubled, about 20 minutes.
4. Whisk egg and water; brush over loaves. With a sharp knife, make four shallow slashes across the top of each loaf. Sprinkle with sesame seeds if desired. Bake at 375 degrees F for 20-25 minutes or until golden brown. Cool on wire racks.


I omitted the cornmeal since I baked on a well seasoned stone. I also omitted the toasted sesame seeds just because I was feeling lazy. Do what you like. I would suggest making your slits after you glaze. That will insure that classic contrast in color. Happy baking!

Tuesday, November 10, 2009

Carrot Bread!

Mmmm...Mmmm!

I've never had carrot bread before but this stuff is yummy. I even used the carrots that came out of my own garden.


See?!


The recipe was found on cooks.com. Here it is:

2 eggs
1 cup sugar

2/3 cup oil

1 1/2 cups flour

3/4 teaspoon baking soda

1 teaspoon cinnamon

1 teaspoon nutmeg

1/2 teaspoon salt

1 1/2 cups finely grated raw carrots

1 cup chopped walnuts
3/4 cup raisins

Preheat oven to 350F degrees.
Beat eggs and add sugar and oil. Sift together flour, soda, cinnamon, nutmeg and salt, and add to egg mixture. Beat well. Add carrots, nuts and raisins. Grease a 9x5 inch loaf pan and pour in batter. Bake one hour.

I think it could probably have used a full cup of raisins and I ended up baking it for 70 minutes instead of 60. I have made this recipe a second time and I'm almost ready for a third. This most recent time, I made them into muffins. The perfect size and the outside wasn't too crusty. I baked them for about 20 minutes but check yours with a toothpick until it comes out clean. I still like slicing this and having it toasted with butter. Oh and I substituted apple sauce for the oil on the second round and they were still just as yummy! My next round will be in mini loaf pans. Anyway you have it though, it's a hit! I can't wait to have a slice of this toasted with some cream cheese. Mmm.

Sunday, January 18, 2009

My Favorite Pizza Dough Recipe

Makes 3 pounds of dough

INGREDIENTS
4 1/2 teaspoons active dry yeast
2 cups warm water
1/2 teaspoon sugar
5 cups all purpose flour
2 teaspoons kosher salt
Olive oil for brushing

DIRECTIONS
1. In a glass measuring cup, sprinkle the yeast over the warm water. (not hot water. That would kill the yeast) Stir in sugar and let stand until foamy. About 5 minutes.

2. In a large bowl, mix 2 cups flour with the salt. Add the yeast mixture and stir until smooth. Add the remaining 3 cups of flour and stir until a stiff dough forms. Turn out onto a floured surface and kneed until smooth and elastic. About 5 minutes or less. Transfer to a larger bowl lightly brushed with olive oil.

3. Cover the dough with plastic wrap and let rise in a warm, draft free spot until doubled in volume. Should be about 1 hour.

4. Punch down the dough and kneed it 3 times. Divide dough into desired portions. Transfor to a lightly floured surface and cover with plastic wrap or a kitchen towel while working other dough rounds into pies.

MAKE AHEAD
This recipe can be made in advance and prepared through step 2. Cover with plastic wrap and refrigerate overnight. The dough can also be frozen up to one month. If usig the freezer method, allow dough to thaw in refrigerator overnight and continue the steps as provided. I have noticed the rising time might be a little longer. Just wait until it has doubled in size.

This recipe was found on foodnetwork.com and provided by Giada De Laurentis

Sunday, June 29, 2008

English Muffins


Nic and I are breakfast people through and through. Anytime of day is good for any type of breakfast. English muffins with jam happen to be one of our favorite quick bites. Thomas muffins were our favorite until one day I decided to see if I could make them myself. It wasn't the cost but the desire to make them myself. I know, I know...I'm strange like that.

Once I use a couple more cans of crushed tomatoes, I'll have the rings I would like to use for another recipe. :-) I'll post that one once I try it. This is the recipe that I've been making lately. Courtesy of KingArthurFlour.com.


English Muffins


English muffins are amongst the most popular breakfast foods. Quick and easy to eat, they can be as simple as a muffin-with-jam to all-dressed-up with ham, poached eggs and hollandaise sauce for an elegant eggs Benedict.
1 3/4 cups (14 ounces) milk, warm
3 tablespoons (1 1/2 ounces) butter
1 1/4 teaspoons salt
2 tablespoons (7/8 ounce) granulated sugar
1 large egg, lightly beaten
4 to 4 1/4 cups (17 to 18 ounces) King Arthur Unbleached Bread Flour
2 teaspoons instant yeast
Place the ingredients in the pan of your bread machine following the manufacturer's instructions. Use the "dough" or "manual" setting. After the cycle is complete, transfer the dough to a cornmeal-sprinkled surface and roll it out until it's about 1/2-inch thick. Cut out circles with a floured 3-inch cutter. Re-roll and cut out the leftover dough. Cover the muffins with a damp cloth and let rest for about 20 minutes.

Heat a frying pan or griddle to very low heat. Do not grease, but sprinkle with cornmeal. Cook four muffins at a time, cornmeal side down first, for about 7 minutes a side.

Check after about 3 to 4 minutes to see that the muffins are browning gently and are neither too dark nor too light; if they seem to be cooking either too fast or too
slowly, adjust the temperature of your pan or griddle.

When the muffins are brown on both sides, transfer them to a wire rack to cool, and proceed with the rest. If you have two frying pans (or a large griddle), you'll be better able to keep up with your rising muffins. Yield: 16 muffins.
Nutrition information per serving (1 whole muffin, 2 halves, 59g): 140 cal, 3g fat, 4g protein, 23g complex carbohydrates, 1g sugar, 1g dietary fiber, 24mg cholesterol, 194mg sodium, 78mg potassium, 38RE vitamin A, 1mg iron, 77mg calcium, 55mg phosphorus.
©2007 The King Arthur Flour Company, Inc. All Rights Reserved.


They were super easy and delicious!


I also didn't use a cutter...I just used one of my larger glasses. I dipped it in flour each time to make sure it didn't stick.


This particular time, I had my griddle set to 300. It took about 15 minutes on the first side...

I did notice that I had to leave them on the griddle longer than the recipe called for but that could be that my griddle is getting old and doesn't heat as evenly as it used to. It also might be that I like mine a little more brown than store bought.


...and 10-12 minutes on the second side.

I love the flipping part. You can see the little pillow of goodness sink into the warm griddle. Try it, you'll see.

Since you probably wont be able to fit all of your muffins on the griddle at the same time, start round 2! :-)

It's important that you split the muffin properly so that you can utilize all of those nooks and crannies we've just worked so hard to get. Not just any knife or even the worlds greatest bread knife will do. You must use a fork! Go all the way around the edge. No wiggling, or sliding. Just poke in a straight line all the way around.

Then split when you've come to where you started.

As I was saying before, this is best toasted with your favorite jam. As I was making these, I went to the basement to grab another jar of my homemade jam only to realize that it's my last pint!
Let's get a closer look. Mmmmm......

I guess you'll be seeing the recipe for that soon too! Stay tuned as strawberry and blueberry season season is just around the corner!

Wednesday, March 19, 2008

Lasagna

Well, this blog comes out of my love of cooking. Over the years I have collected and adapted recipes to my families liking. This recipe is one that I've been making since my husband and I started dating nearly 7 years ago. This started as his fathers adaptation of his mothers, which has worked its way to becoming my creation. Handing down recipes the way all Italians do. The way legends are made.

My Lasagna starts with a basic meat sauce.

1 Onion, medium to large (depending on how much you like onions)
4-6 Garlic Cloves, fat (depending on how much you like garlic)
2 28oz cans of crushed tomatoes (I'll be trying my hand with fresh toms this year. Check back for details)
1.25 lbs Ground Beef
1.25 lbs Italian Sausage (I prefer hot but medium works great for those that don't like heat)
Basil
Parsley
Oregano
Black Pepper
Salt
Olive Oil
1/4 cup red wine (optional)

First step is to chop your onion and garlic. Put about 2-3 tablespoons of olive oil in your stock pot and toss in the onion and garlic. I like to get this good and caramelized before adding the meat. I think that waiting for them to turn a pretty brown takes a lot of the bite out of the onions. While these are working their magic in the pot, go ahead and mix your meat together. Snip the casing off of the sausage and blend it well with the beef. By blending it, you will ensure good chunking, as I like to call it. I couldn't stand getting a bite of beef, then a bit of sausage. Now the flavors will marry perfectly. Go ahead and add it to the onions and garlic. Make sure to move things around so all sides get brown. You also have to do a little stirring and banging to make sure the pieces break up small enough to be bite size. While the meat is browning, take the opportunity to measure out your spices. I usually do things by the palm full and eyeball it but I've also made this more times than I can count. If you had to force me, I'd say it's probably about, 2 tablespoons each (basil, parsley and oregano), 1 teaspoon each (black pepper and salt). Set aside. Once meat is browned and cooked all the way through, add both cans of tomatoes. If you are going to add red wine, you would do it now. Rinse the 2 cans of toms with the 1/4 cup of red wine and add to the pot. Toss in your bowl of seasonings and stir. For now your meat sauce is ready and waiting on the other layers of the Lasagna. Let it cook while you're doing the other preparations. Letting it thicken a little will make sure your lasagna isn't runny. This could also be the part where you stop if you just want a meat sauce for spaghetti, ravioli, etc.

Cheesy Layers
1 Large container Ricotta Cheese (28 oz. I believe...the largest my grocer carries)
2 lbs Shredded Mozzarella Cheese
1/4-1/2 cup of Parmesan Cheese (Depending on your preference)
Basil
Parsley
Oregano
Black Pepper

Dump your ricotta into a mixing bowl. Add 1 Tablespoon each, basil, parley, oregano. Add 1 teaspoon black pepper. Add desired about of Parmesan cheese and mix thoroughly. Leave shredded Mozzarella aside until later.

Now comes the assembly. The no boil noodles are the easiest. If I'm making this for a crowd, I'll make it in my large glass casserole dish. When I'm making it for just me and hubby or for my parents, I use the smaller, disposable tins (Not my favorite choice but I haven't yet invested in small and medium ceramic dishes yet) and put the extras in the freezer.

Layers go...from bottom to top
Meat sauce
Shredded mozzarella
Noodles
Ricotta mixture
Meat sauce
Shredded mozzarella
Noodles
Ricotta
Meat Sauce
Shredded Mozzarella

Make as many layers as you can fit in the dish. Just make sure your top layer is Mozzarella. If it mounds slightly you should be fine. Press it together to make sure nothing will fall off and place a cookie sheet under the casserole dish to catch any drippings when baking.

Now you're ready to bake at 400 until the cheesy top is golden. If you will be refrigerating this prior to baking, reduce your temperature to 375 and bake until golden. These make perfect freezer meals as well. I have had good luck baking small portions directly out of the freezer @ 350. I would not recommend baking from frozen on anything larger than 3 portions. You might get a golden top with a chilly center. Just make sure you take it from freezer to refrigerator the night before if you are making a family size. Once taken out of the oven, let sit at least 15 minutes before cutting. No one likes a runny lasagna.

Next time I make this, I will take pictures of all the steps. Happy eating! Enjoy!